

A tutorial on installing Kaspad on Windows — used for solo mining and participating in the Kaspa network.
Kaspad Full Node
Kaspad is the reference full node program for the Kaspa cryptocurrency network. By running a Kaspad node on your desktop computer, you become an active peer in the Kaspa network. By doing so, you can participate in the validation and propagation of transactions and blocks. In addition to contributing to the network’s security and decentralization, running a Kaspad node allows you to directly mine to it in full solo without relying on mining pools. Running a Kaspad node is a rewarding way to engage with the Kaspa ecosystem and help support its growth and development while giving you access to some exciting features.
While Kaspad can run on various hardware configurations, having at least 4 to 8 GB of RAM, a 4-core CPU, and a good internet network connection is recommended. While some computational work involves processing and verifying transactions and blocks, it’s not very demanding, especially for modern computers with decent processing power. However, the amount of storage space required can be significant. Therefore, having enough disk space to store the blockDAG data is essential. About 50GB should suffice.
To start the process, download the Kaspad full node program from the official GitHub repository (https://github.com/kaspanet/kaspad/releases):
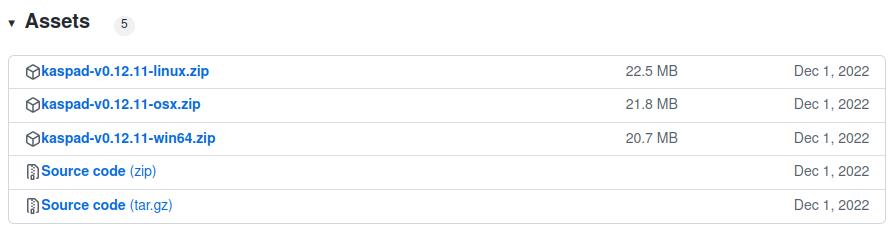
It’s vital to download the latest version of Kaspad so that your node is up to date with the most recent improvements and bug fixes. For this tutorial, we will be using the Windows release. Once you have downloaded the Kaspad .zip file, extract the files to a directory of your choice. For example, it was extracted to a folder named kaspad on my desktop.
Open a command prompt or terminal window. Search for “cmd” in the Start Menu on Windows or by pressing the “Windows key + R” on your keyboard and typing “cmd” in the “Run” dialog box, then hit “Enter.” Alternatively, you can also use PowerShell, which is another command line tool available on Windows.

Navigate to the directory where you extracted the Kaspad binary. You can use the “cd” command followed by the path to the directory. For example, suppose you extracted the files to a folder named “kaspad” on your desktop. In that case, you can navigate to that directory by typing “cd Desktop/kaspad” (assuming your desktop is located in the default location). Typing “dir” will display the contents of this folder:
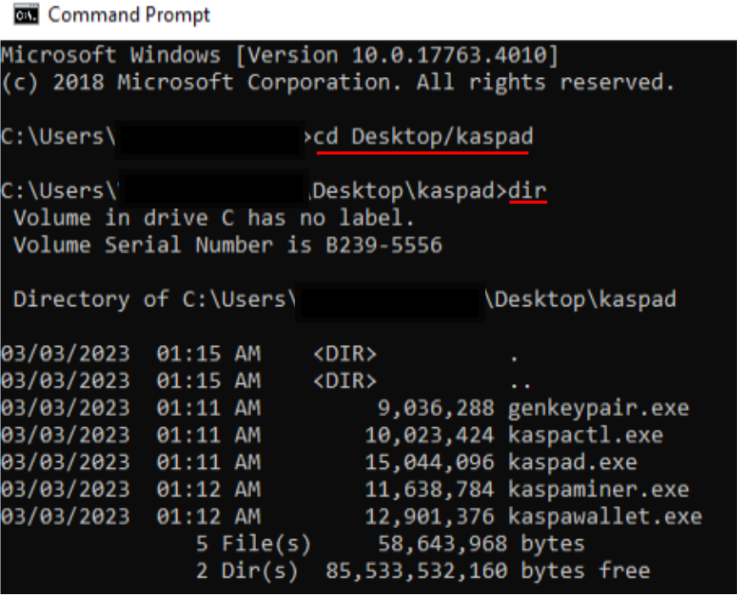
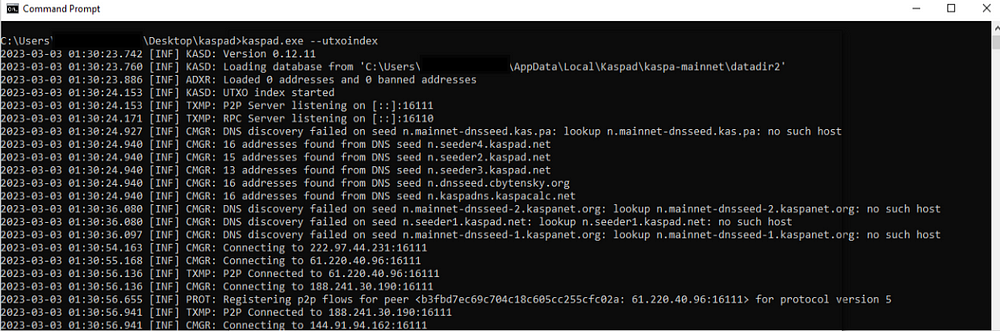
The output of the “dir” command shows several executables in the directory. To run the Kaspad node, you must execute the “kaspad.exe” file by typing “kaspad.exe — utxoindex.” The additional “— utxoindex” flag enables UTXO indexing, which is necessary for the node to function correctly. When you start the node, you may receive a firewall warning. Click “Allow” to allow Kaspad to run properly.
The node will begin syncing with the rest of the network. This process can take some time, usually around an hour or more, depending on the speed of your internet connection and the specifications of your hardware.
You will know that synchronization is complete when you see messages such as “Accepted block ***** via relay” in the command prompt or terminal window. ***** being the block hash. Once your Kaspad node is fully synced with the network, you can use it in various ways. For example, you can mine directly to your node, create your own CLI wallet to send and receive KAS in command lines, or query the blockchain for transaction data.
That’s it! With these simple steps, you can easily run a Kaspa node on your desktop computer and start exploring the world of Kaspa.
Tip: AvogHadro is a Community Helper in the Kaspa Discord. As an avid Kaspa supporter and crypto enthusiast, AvogHadro‘s knowledge and support is well respected and valued within the Kaspa Community.
Find me on the Kaspa discord — Bubblegum Lightning